Watson & Co. Chartered Marketing Digital Business Skills Tool of the Week: Google Local Guides

Why use Google local guides as a marketing tool?
If you’re into photography, video, reviews and sightseeing, Google local guides is a great place for you to contribute your own work and contribute to how your destination appears on the map.
Local Guides by Google is a platform which allows millions of people to add photos, videos, reviews, missing locations to enhance the digital footprint of Google Maps. The app allows individuals around the globe to add their own content from anywhere and everywhere. Google Local Guides is a simple platform that can be used and/or contributed to via mobile, tablet, laptop and desktop devices.
Step-by-step guide to setting up as a contributor on Local Guides
To get Google Local Guides up and running you can follow this simple step-by-step guide to set up and start contributing your photos, videos, reviews and places. It really is very simple to get started and requires less than 10 steps:
Creating a Google account
Step 1: How to setup Google local guides
Step 2: Contributing
Step 3: Adding Photos
Step 4: Adding Videos
Step 5: Adding Reviews
Step 6: Adding Missing places
Step 7: Leveling Up
Step 8: Meet Ups
Different local guides levels
Google local guides rewards table
Google local guides connect
To contribute to Local Guides you will first need to have a google account –
Creating a Google account
To create a Google account you can simply search “Google account”. This will bring you to a Google account landing page on which it will say “Register or Sign in”. If you have not created a Google account you will need to register and fill in your details that they need to create your account. If you have already created an account on Google then all you need to do is “Sign in”. You cannot become a “Google local guide” without a Gmail account (Google email account).
Once you have either created your account or signed into your Google account you can now start the process of becoming a Google local guide.
Step 1: How to set up Google Local Guides
To set up as a Google Local Guide you will need to either download the “Google maps” app (if your mobile device comes with “Google” features then you will already have “Google maps” on it). You will need to access the app and then log into it with your “Gmail” account. The image below shows the start-up screen for Google local guides after you have created your account and logged into it. This is what it will look like once you have either created a Local Guides account:
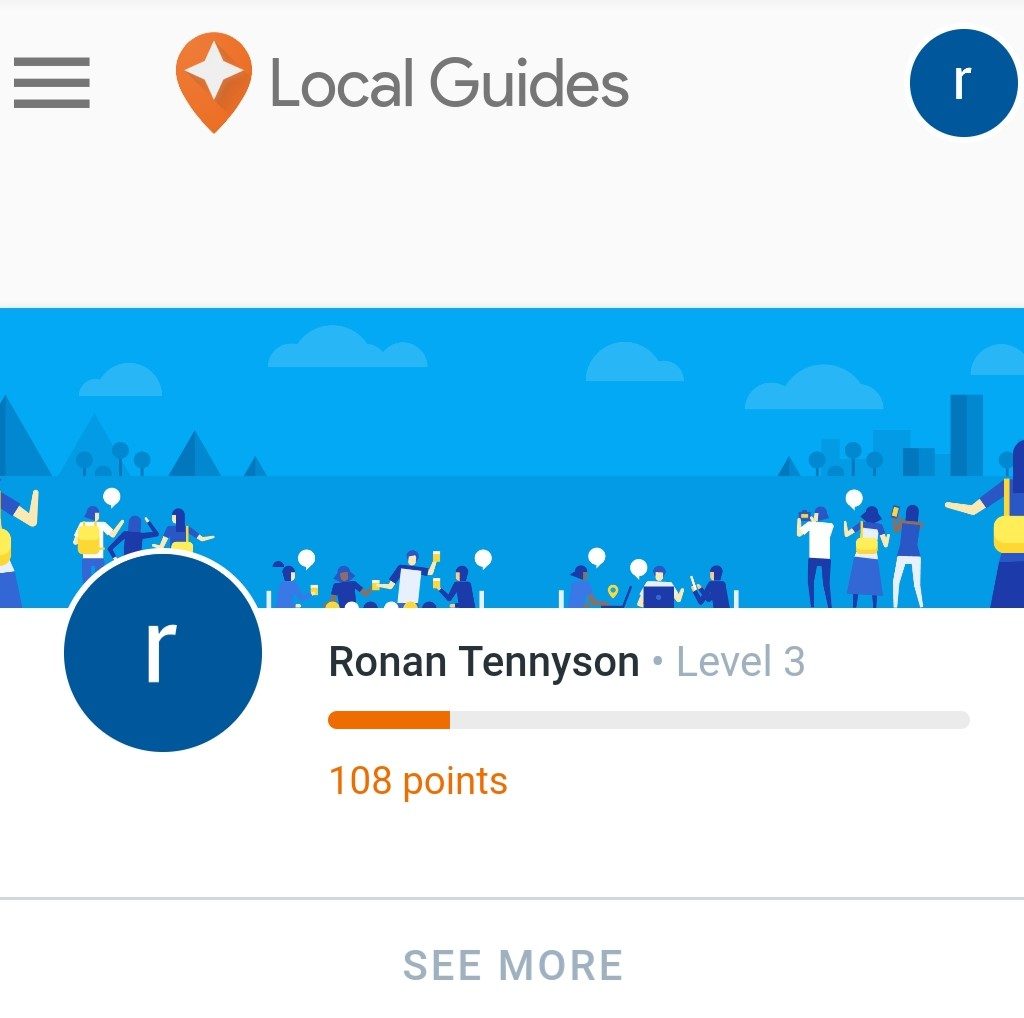
Once you have created or logged into your Google local guides account it is from here that you can start your journey to become classified as an “expert” or “master” photographer, director, reviewer and/or trailblazer “Local Guide” by Google.
Step 2: Contributing
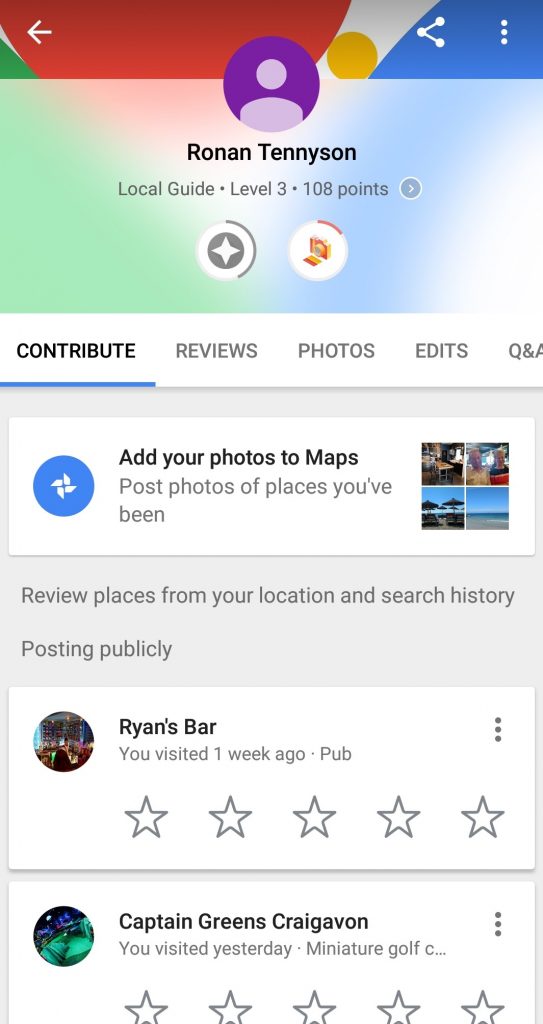
Once you have created an account for Google local guides you can now start contributing to Google Maps by adding your photos, videos or reviews of different areas or places that you have visited. You can also submit brand new places if they can not be found on Google Maps.
Below shows a print screen shot of the website demonstrating how you can start adding in your reviews, photos and videos:

Step 3: Adding Photos
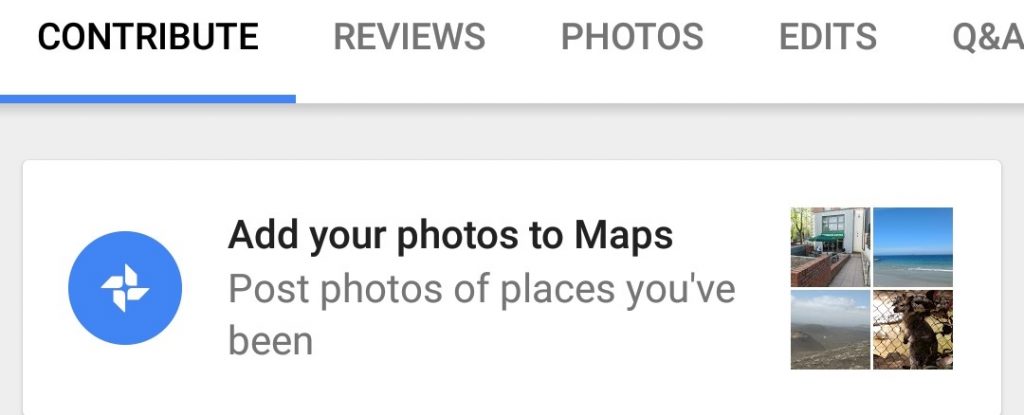
The print screen below shows how to add “Photos” onto Google local guides.
This really is easy to do – all it takes is a simple click on “Add your photos to Maps”. This adds your photos to Google maps to the location that you took the photo from or to the place you have chosen to ‘contribute’ to.
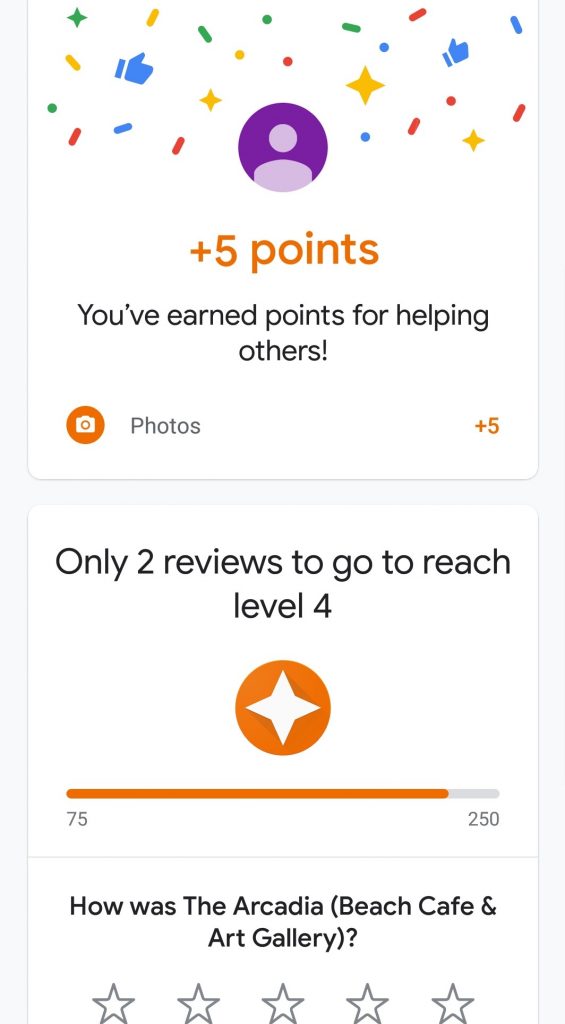
Once you have started to contribute your photos, videos or reviews onto local guides you will be awarded with points on which you can level up through the Google Badges. The print screen below shows what happens once you have contributed your first photo onto Google local guides.
Step 4: Adding Videos
The print screen within “Step 3” shows how to also add “Videos” onto Google local guides. This is easy to do as all it takes is a simple click on “Add your photos to Maps”. Although it says add “Photos” you can also add in any video content that you have captured. This adds your videos to Google maps to the location that you took the video from or to the place you have chosen to ‘contribute’ to.

Step 5: Adding Reviews
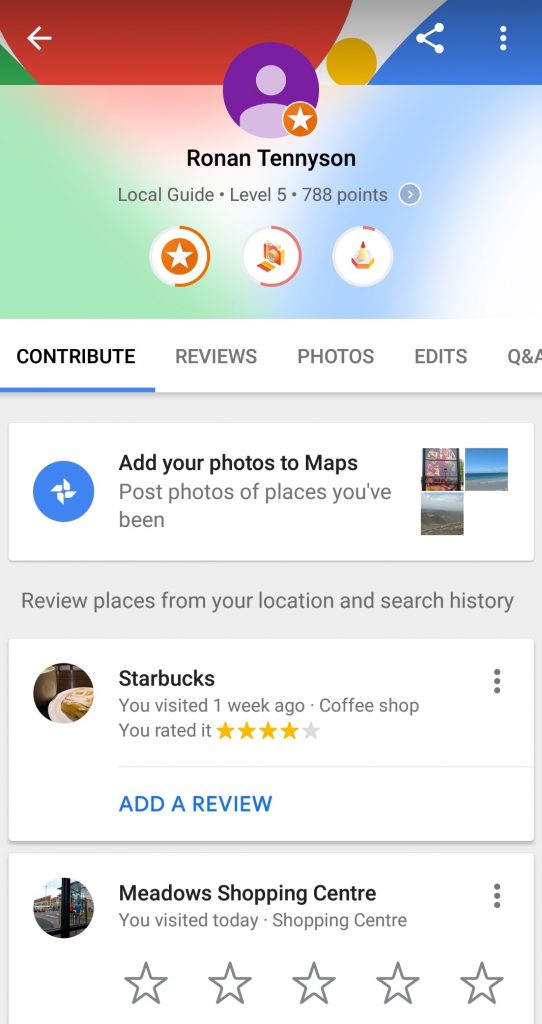
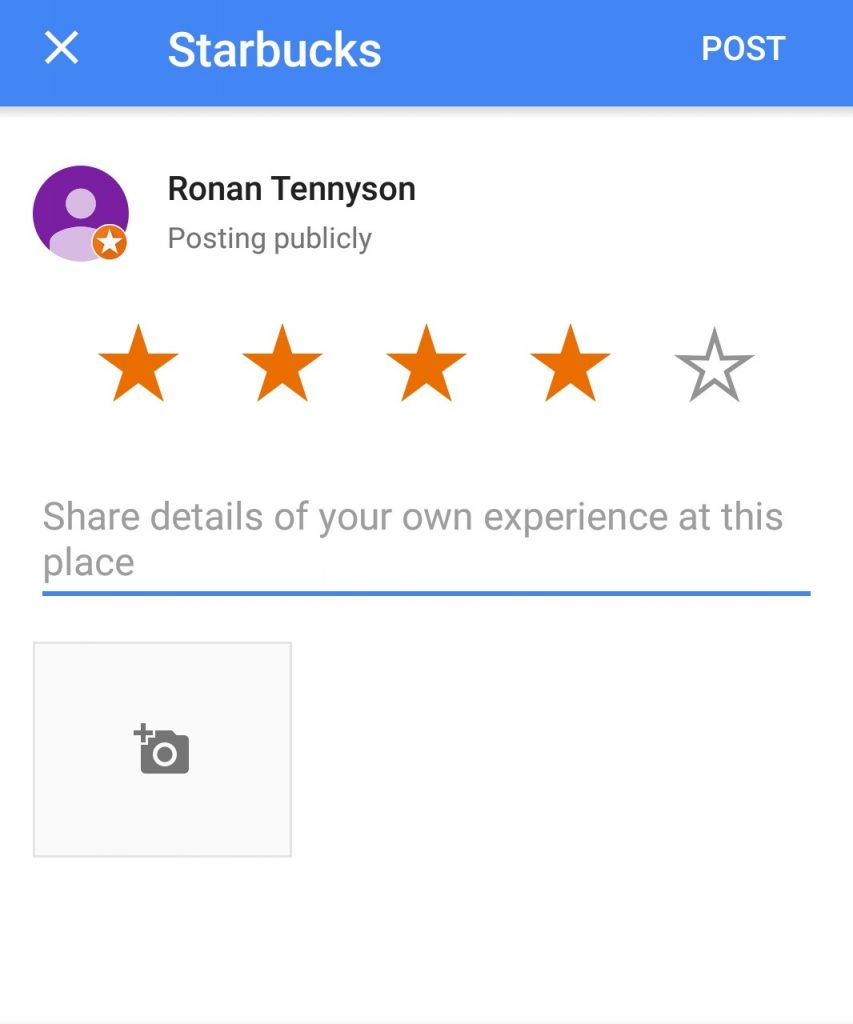
The print screen below shows how to add a place “Review” as a Google local guide onto Google Maps.
This is easy to do as and all it takes is a simple click on “Add your first review”. This adds your review to the place that you are reviewing on Google maps. After adding photos and/or video Local Guides also sends you an auto cue asking if you would like to contribute a review at the time of adding your photos/video.
Step 6: Adding Missing places
To add in a missing place to Google local guides you firstly need to be in the “Google Maps” app. Once you have either downloaded the Google maps app or clicked on it and accessed it you can then start to add in places that maybe Google has missed in your area. The image provided below shows where you can add in a missing place onto “Google Maps”.
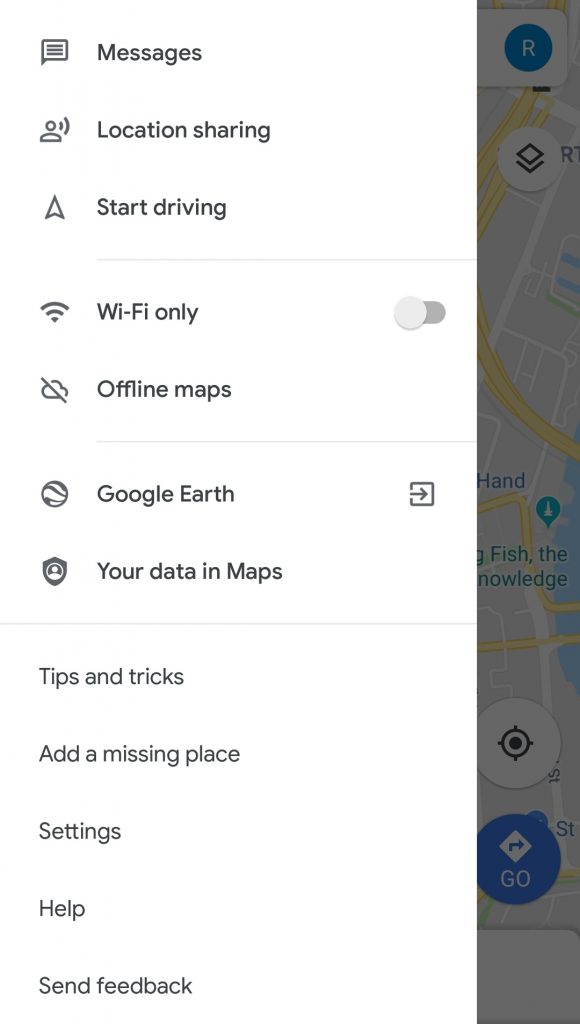
Once you have clicked on the “Add a missing place” on Google maps it will then bring you to another page. You will then need to fill out the details on what the missing place is on which you are adding and where it is on “Google Maps”. The image below shows the details that you will have to fill out about the location on which you are adding.
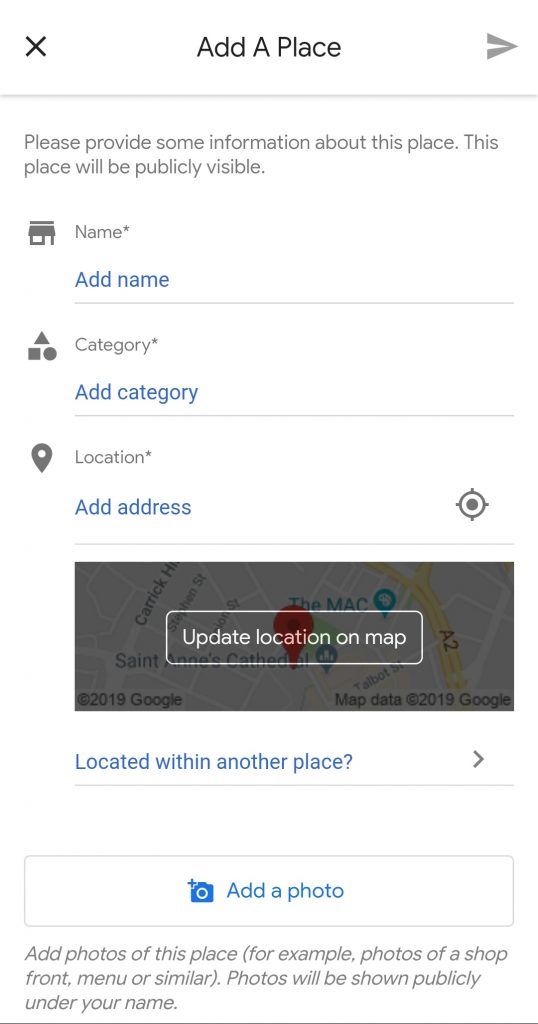
Once you have filled all the details out and added photos of the location you can then submit your request about the missing place. Once it is submitted you will have to wait on Google to approve the missing place. You will receive a email confirming your request on the missing place on which you have provided.
Step 7: Leveling up
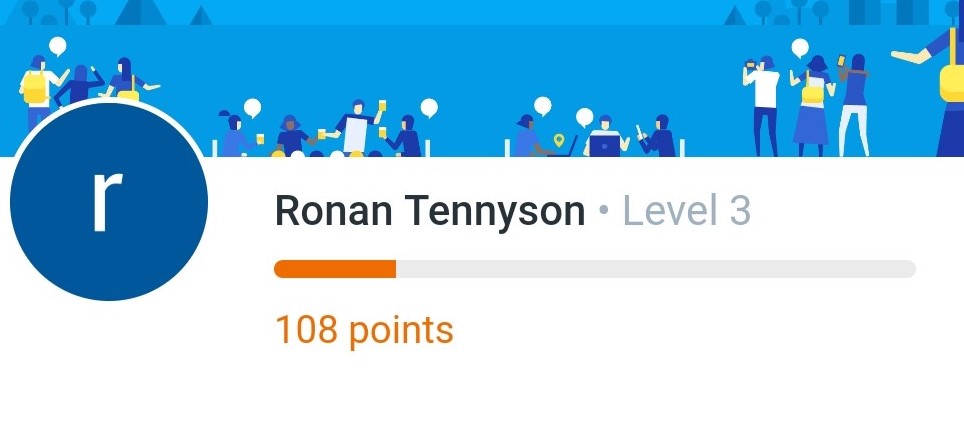
Once you have added in your first photos, videos and reviews you will start to see your level bar going up. In seconds you will see an increase in your level bar. Once you start to add more photos, videos and reviews over level 4 you will have unlocked your first badge.
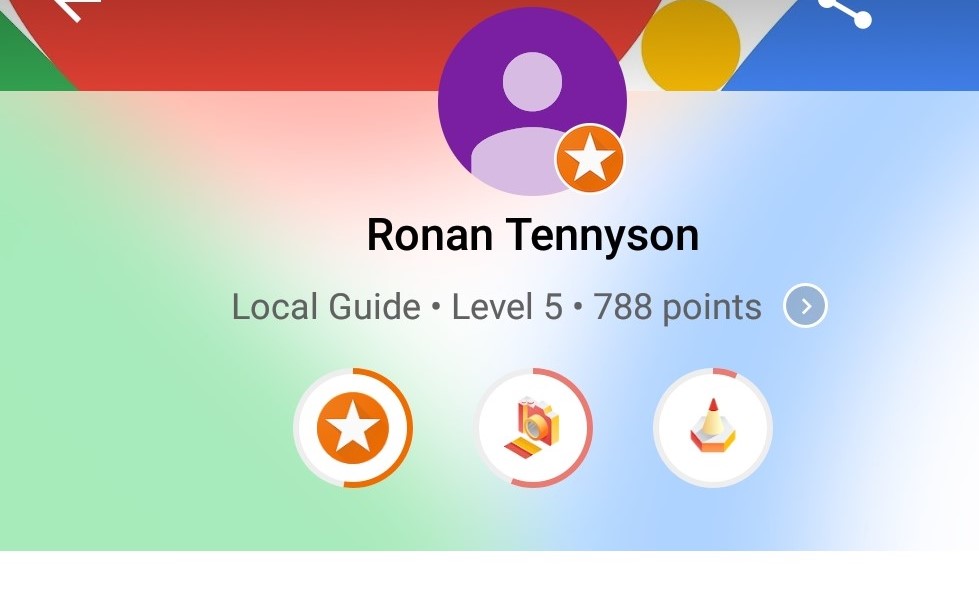
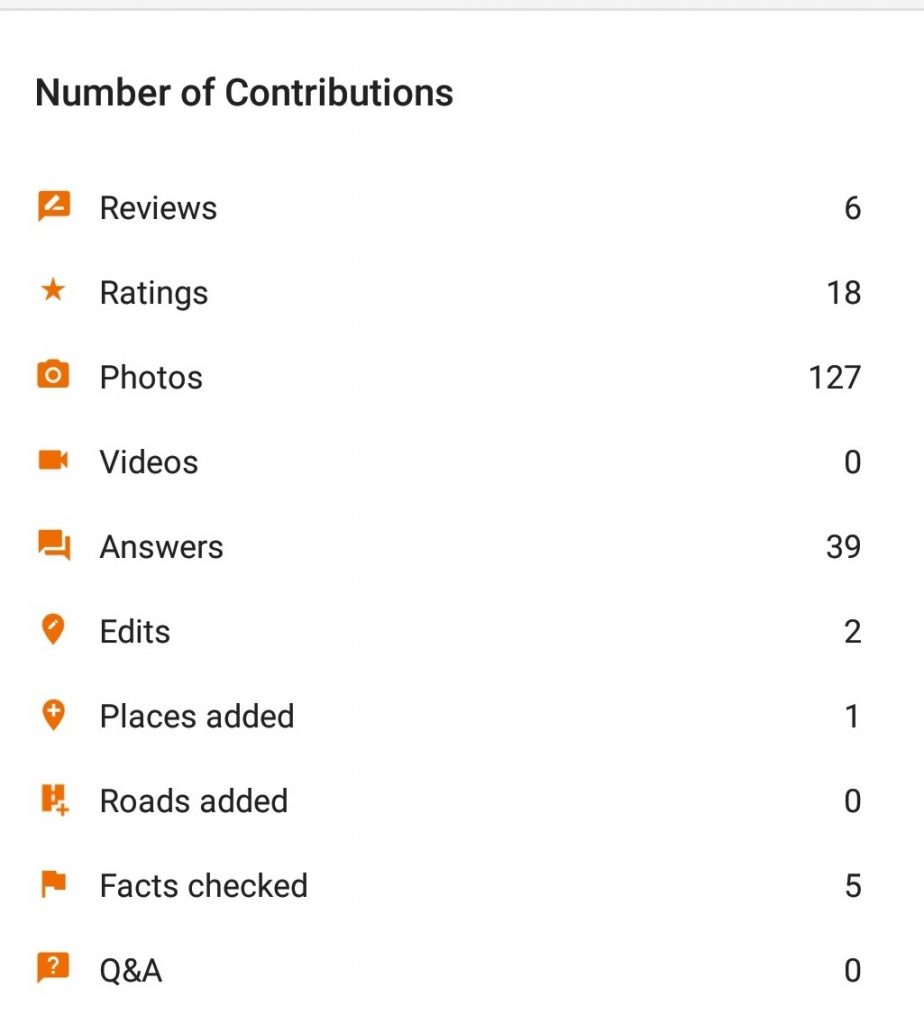
The image below shows the level that are currently sitting on and the number of images and reviews that you have uploaded. This is the layout of what your Google local guide looks like:
Step 8: Meet-Ups
Once you have reached Level 4 you can now start to create your own “Meet-Ups” with other local guides in your area. This is done from the Local Guides website and by clicking on the “Meet-Up” button, as is shown in the print screen below:

Once clicked on the “host a Meet-Up” action will bring up the landing page shown below in the image below and you can start to submit the details required to “Host” your own meet ups.
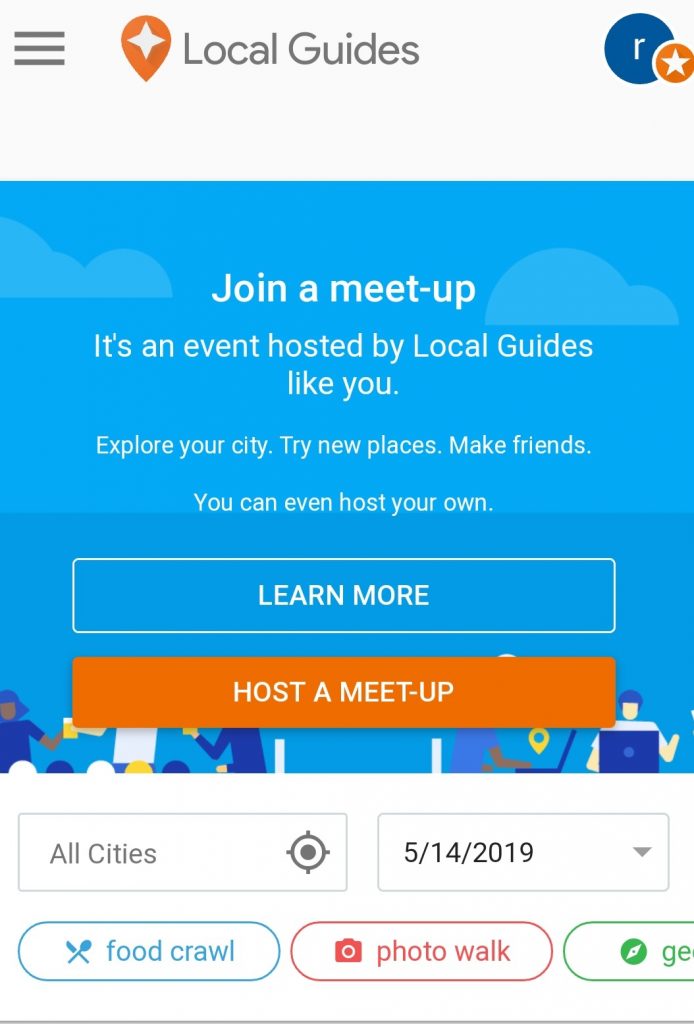
The image provided below shows what happens once you click on the “Host” button. This page allows you fill out details on what day, time and where the meet will happen. After completing the “Host” page you will then need to click on “Submit Meet-Up”.
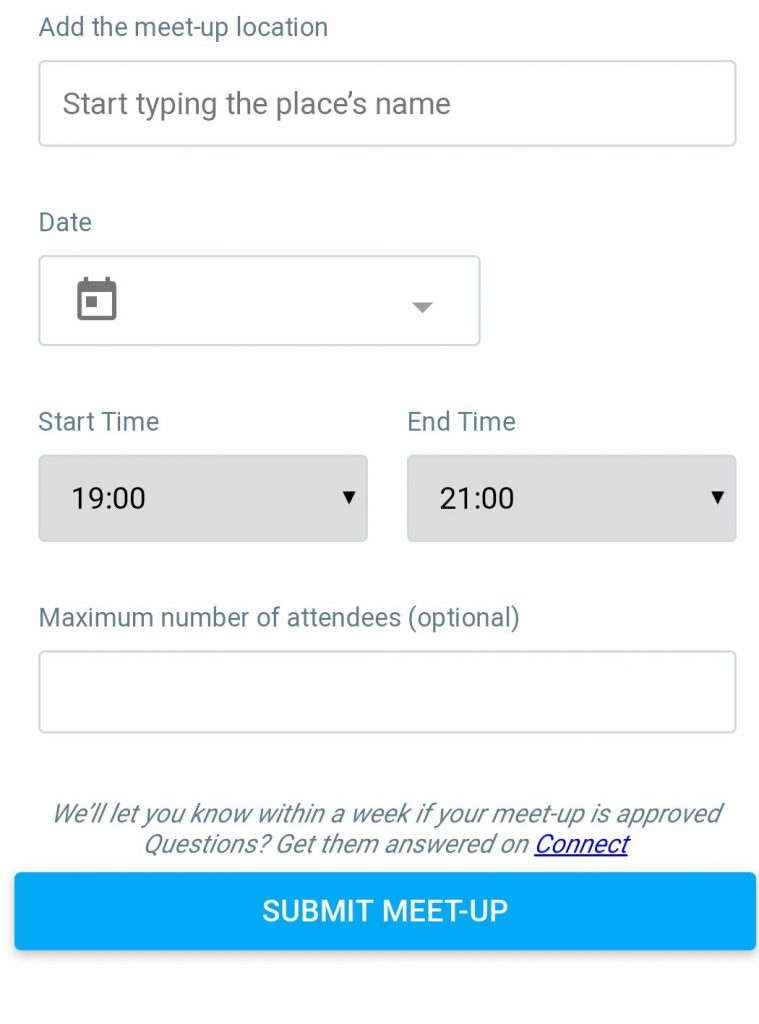
Once you have submitted, Google Local Guides will review your submission and if your Local Guides Meet Up is approved you can invite all the people that you would like to come to the meet-up and Local Guides in your area can find the event hosted on Google Local Guides Connect.
The images provided below show the details on where Watson & Co. Chartered Marketing’s first ever proposed meet-up will be located, what the Meet-Up is (we chose a Photo Tour), the date and time when it will take place and lastly a photo and description for the Meet-Up event page. The image below shows that the proposed “Meet-up” is to take place on 28 May 2019, from 12 midday to 1pm. This meet-up will take place throughout the Linen Quarter, Belfast’s newest destination. Linen Quarter Business Improvement District is a valued client of Watson & Co. Chartered Marketing.
The Meet-Up function is a great marketing opportunity and can facilitate ‘sponsored events’ – the platform allows Local Guides to see when the next local event is in their area.
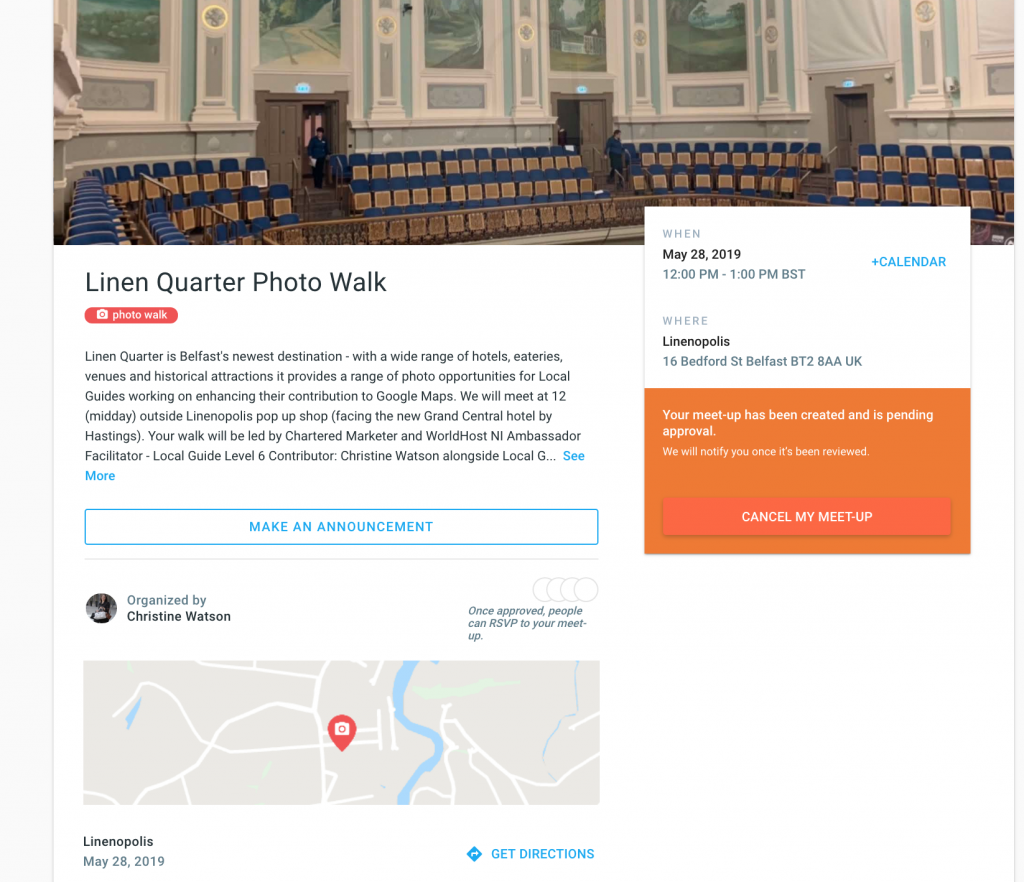
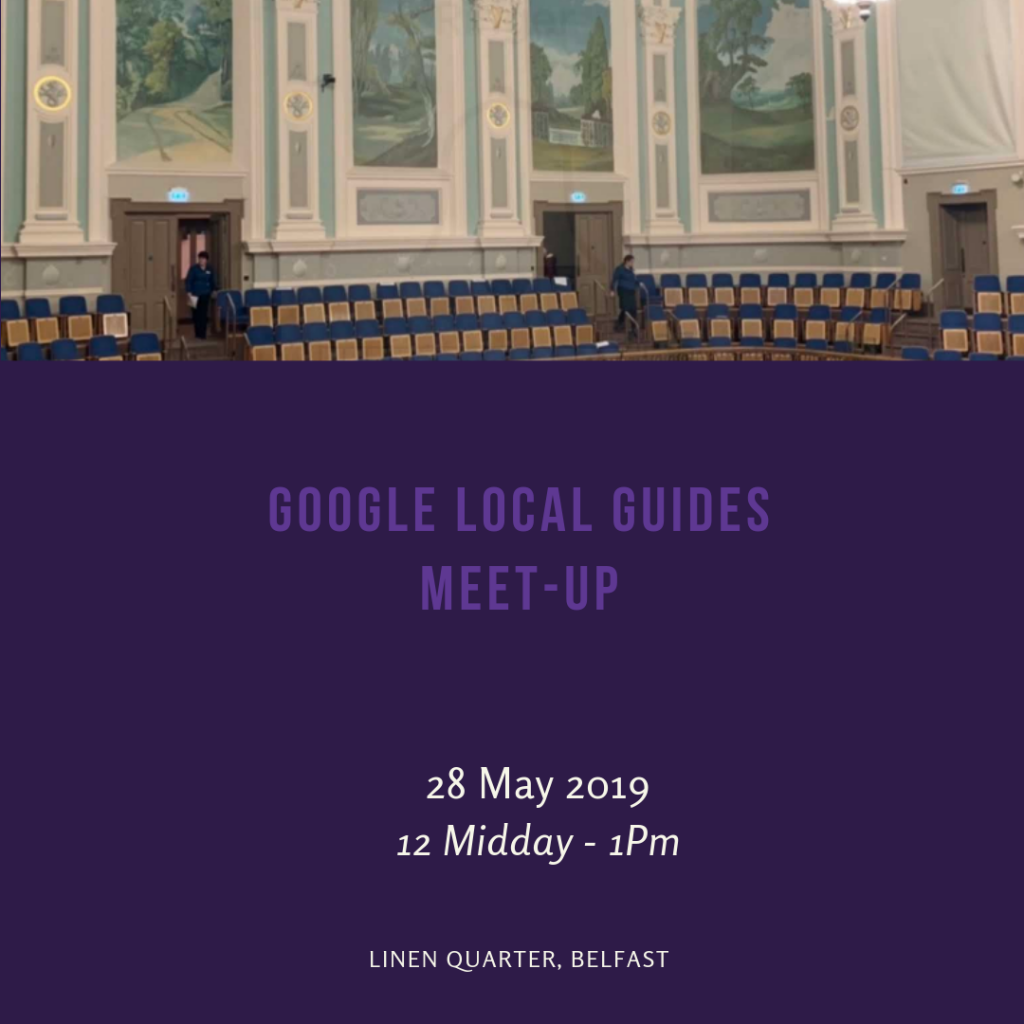
On the 28 May 2019 the local guides event took place that was organised by Christine Watson on which the event was a photo walk of the “Linenopolis Belfast”. This was a great event as it showed myself more of the different locations of Belfast such as the Ulster Hall, Clayton Hotel and many more. The image below shows the Canva graphic that I created for the event.
Different local guide levels
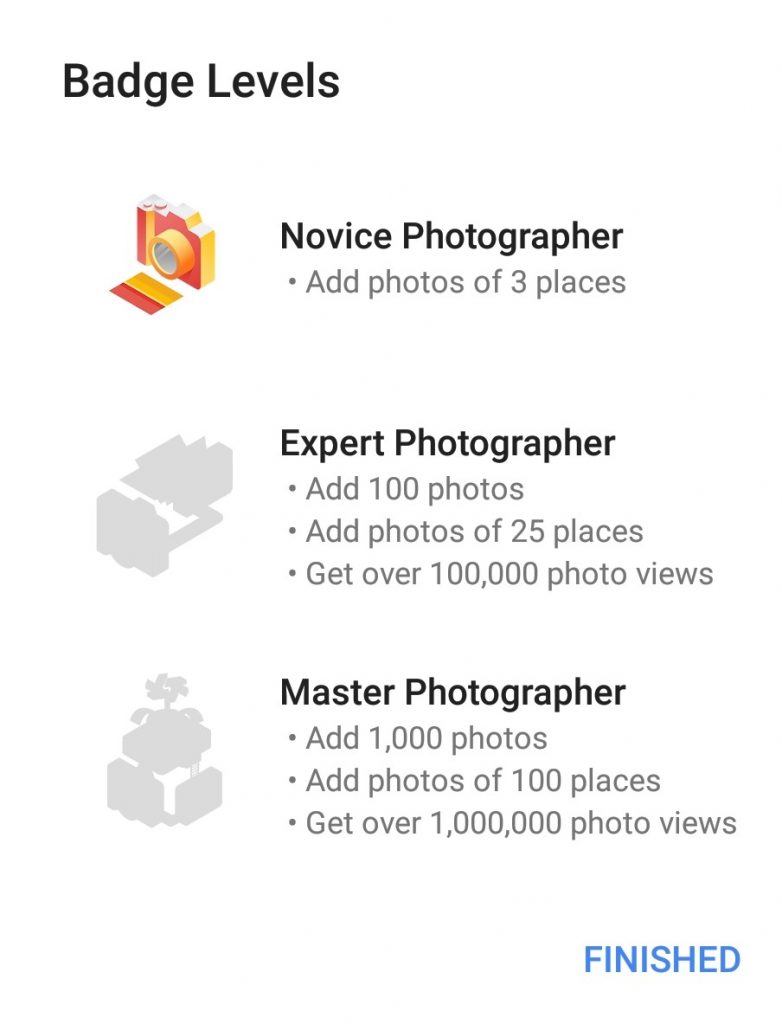
There are 3 different local guide levels. Once you start your local guide journey you will be a “Novice”. These levels depend on how much you contribute to Google, once you start to contribute more and more photos and reviews you will soon be an “Expert” and finally a “Master” Photographer, Director (video contributor), Reviewer and/or TrailBlazer (someone who contributes brand new places to Google Maps). The image provided below shows how you can see the level you are on.

Once you have clicked on the little camera icon it will then bring you to the “Badges” page on which it will show you more about the level you are on and how you have contributed. This is shown below:
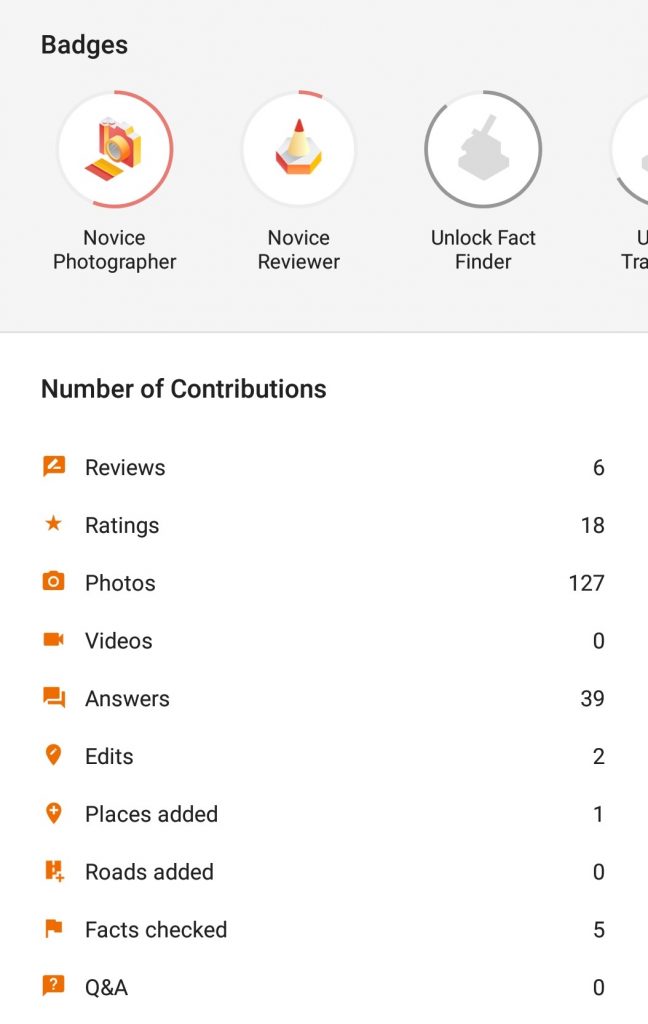
The image provided below shows the 3 level types there are to achieve once you start contributing and tells you what is needed to achieve each accolade. These are shown below in the print screen. The print screen below also shows you the highest level to strive to:
Google local guide reward tables
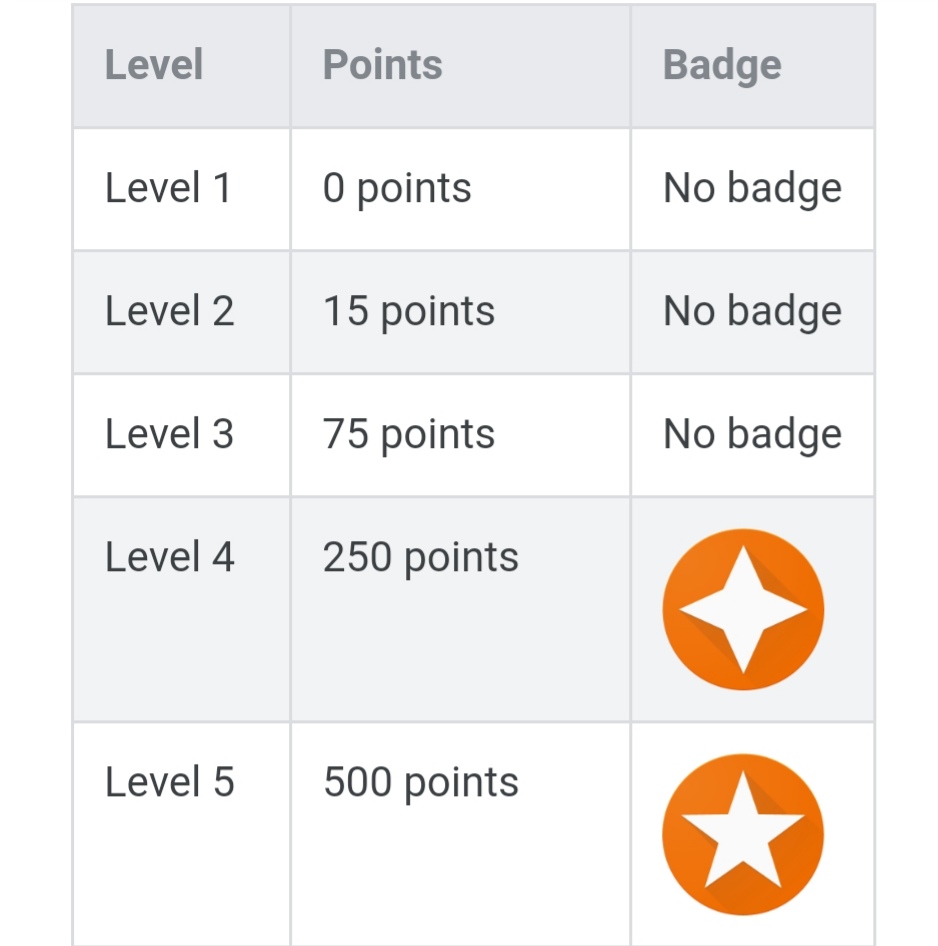
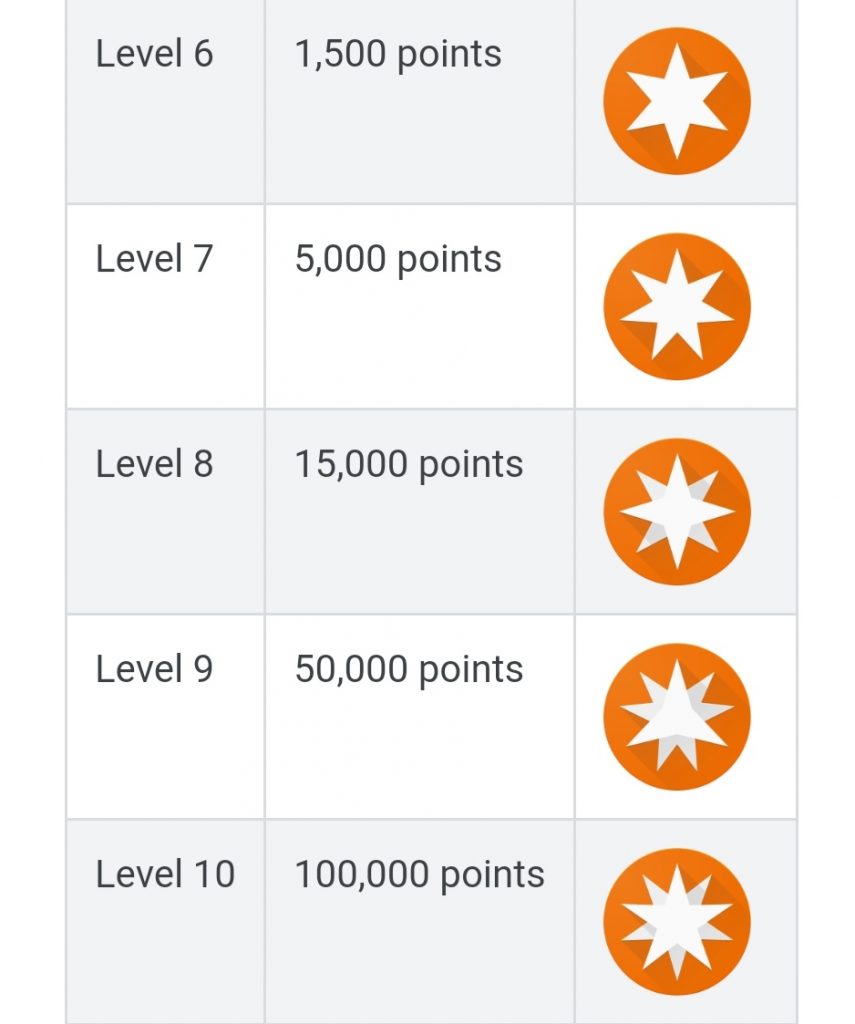
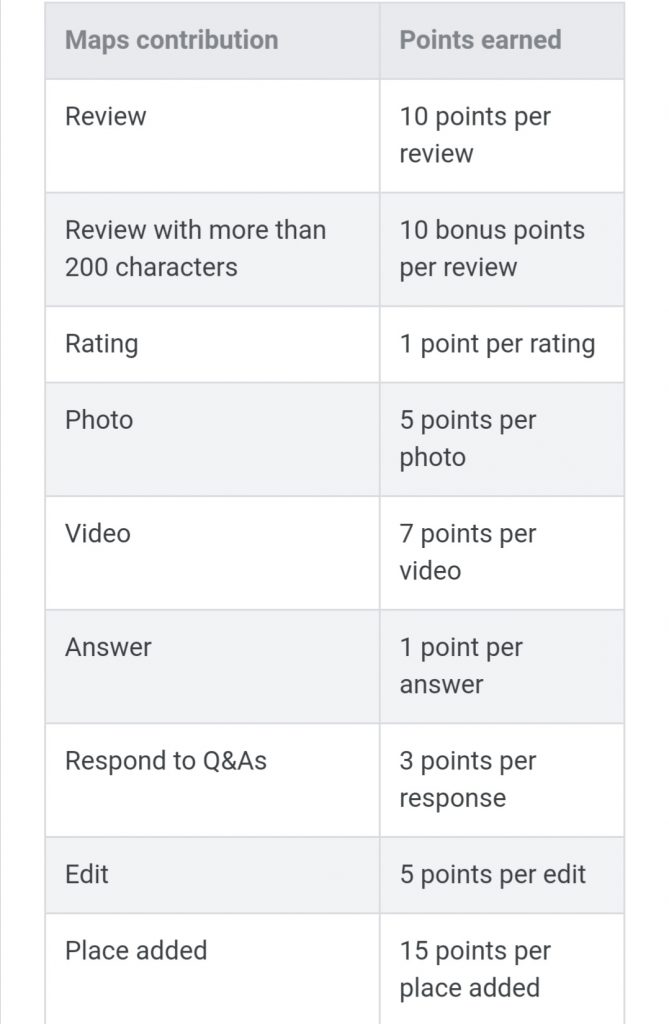
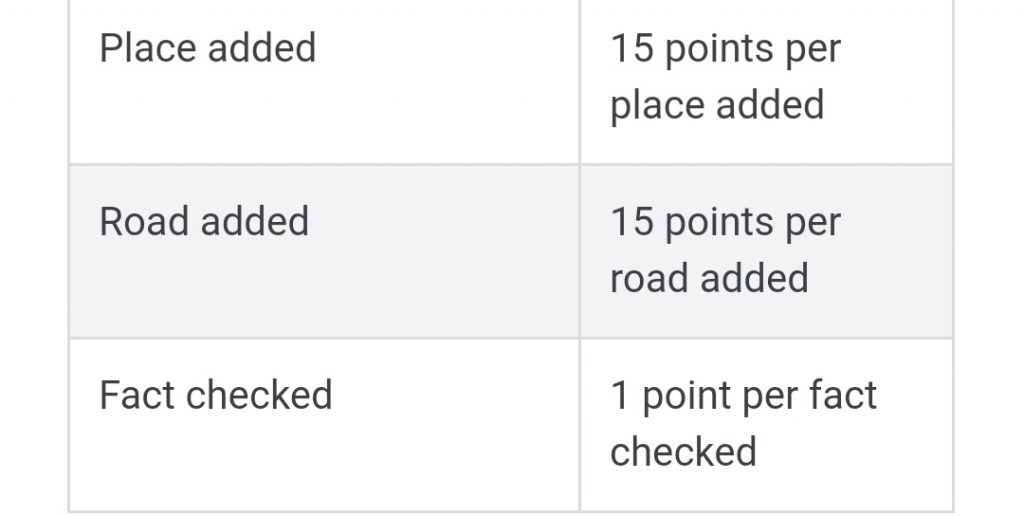
The print screens below show the point system for Google local guides. The first table below shows the points you could earn if you contribute each different item listed. The table following shows the levels at which you can rank. The highest level shown is level 10.
Local Guides Connect
The Google local guides connect is an add on to local guides that allows users to connect with other local guides around their local area or even in other parts of the world. This is useful as it allows you to see what other people are posting and what the most interesting posts on Google local guides are. Local guides connect allows you to share your discoveries and keep up to date on the latest product info, to suggest improvements for the local guides programme and features on Google maps. In addition local guides can visit connect to learn more about photography, food and travel.
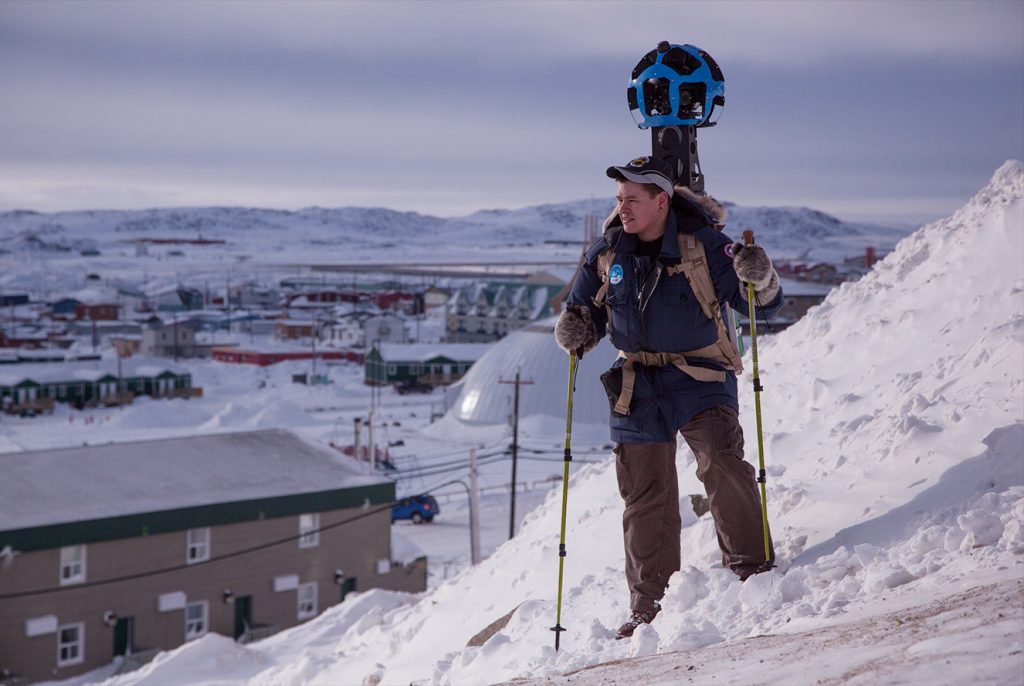
Google Street trekker
Google Street trekker is a device that Google created for people like me who want to explore places that Google can’t and post them on Google local guides. Google have street view within Google maps that is taken from a car which drives around with a camera on top of the roof taking photos of everything around it. The camera takes 360 view photos of everything around it. This is a restriction of view as the car is restricted to a single path of movement. The car can’t go off road and view anything beyond the road. This is why Google created the Google Street trekker device for people to walk around with a camera on their shoulders to take photos automatically every second to capture every bit of detail on the location on where the person is walking.
This is great as it allows the person with the Street trekker to walk anywhere they wish as they are not restricted like the Google car was as it was restricted to one path. The Google Street trekker is a perfect device to capture the hidden locations that some people can’t see when they come to visit from all over the world. The Street trekker would be perfect for Northern Ireland and the Republic of Ireland as there are so many hidden locations that some people don’t know about that with the Street trekker it would help them to see what they could go view when they visit. The image below provided shows what the street trekker looks like.
About Me
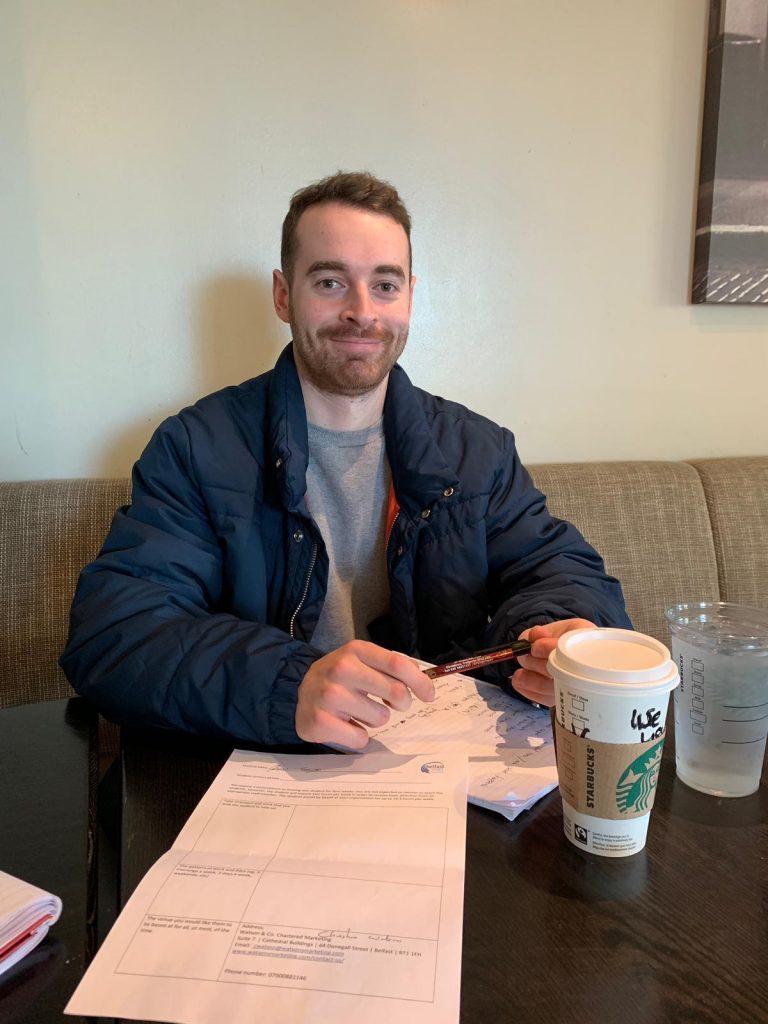 Before my traineeship with Chartered Marketer and Trainer Christine Watson, founder of Watson & Co. Chartered Marketing I had never used Google local guides or even heard about contributing photos, videos and reviews to Google maps. I had only ever used Google Maps for finding directions and had never added a thing to a tool that I found useful in my everyday life.
Google local guides became a part of my placement training and I was tasked to contribute my own footage from different places that I have visited across Northern Ireland in order to add to how the destination is portrayed globally.
Google local guides is an amazing platform that allows people from all walks of life to upload content of, about and within the locations and places that they have visited in order to show others who may have not visited and showcase the area. A form of place marketing it allows people to see what each place or wider destination in reality, above and beyond what is portrayed in staged polished marketing photos and video content. This is great as it allows people from different countries to view different places globally. Google local guides can be quite addictive – I started at Level 0 and have been leveling up super quickly – in the space of 2 days I reached level 3 from just posting a couple of photos and reviews from places that I had visited recently. My stretch goal for local guides is level 10 which is hitting 100,000 points (that’s a total personal contribution of something along the lines of 1,000 photos, 100 places and 1,000,000 views!). As of 20 May 2019 I am currently sitting on level 5, with 1,200 points out of 1,500 to get to level 6. It has taken me two weeks to get from level 0 to level 5, simply by adding photos and reviews that showcase Northern Ireland – the place I call home.
I would advise everyone to get into contributing their own footage onto Google local guides as it is rewarding to post your own images that you have taken across your travels. It is also great to be rewarded for taking the time to contribute to how your own local area or country is portrayed on Google Maps.
If you would like to find out more about me and the hands on training I have completed throughout my placement you can by clicking on “About me” above – this will bring you to another blog that I have created on TrainingMatchmaker.com
This video shows the first Google local guides event that I have been to which took place on the 28 May 2019 located in Belfast Linen Quarter, Northern Ireland. The video shows the local guides event with the different locations throughout the linen quarter in Belfast.

Follow Us!